What's new here?

Archive for the ‘Urban Astronomy’ Category

So you want to view the Eclipse…

On August 21st, 2017 a large portion of the Continental US will experience a total solar eclipse. Much of the rest of the continental US will experience at at least a partial eclipse: Philadelphia will have about 78% totality, NYC 75%, Washington DC 84%, Chicacgo 88%, Los Angeles 70%, Seattle 93%, etc.

(more…)

Street Lights they are a’ changin’. How will telescope light pollution filters adapt?

For the hobby of astronomy, the biggest obstacle of all time is light pollution. Hands down. The more lights in yiour area, the less you will see.

We try to fight it when we can. Petition for lights that reduce upward glare, maintain some dark sky locations, and advocate for limiting new lighted areas. But on an individual level, there is only so much we can do to fight light pollution.

One of those things is to employ a light pollution filter.

069

(more…)

Telescope Tips: Dark Skies – The Philadelphia Region

When selling a telescope to a customer, we often give advice on how to view in light polluted areas. Simple stuff such as selecting your targets, using filters, etc. Often we asked “is there anywhere I can go and get away from the light pollution?”

The answer depends on your answer to ‘How far do you want to drive?’

One thing we have in our telescope section is a version of this light pollution map on the wall:

DarkskiesPA

(more…)

The Art of Surviving an Astronomy Session

So you got yourself a new telescope and it is a clear night out. Time to grab the new telescope and bring it outside, right? Hold on there; as many new astronomers have discovered, an observing session isn’t as simple as when you go outside in the winter/early spring to put out the trash. There are several things you should probably prepare before you go out for a night of observing.

DRESSING FOR THE NIGHT WEATHER

Far, far too many folks dress for the daytime weather. This can be a problem for you if the daytime was a happy 78 degrees and then drops as the sun goes down into the 60’s.  Many an observing session has been ended prematurely because the astronomer forgot to wear a sweater.

For colder weather, it is 670px-Dress-for-the-Cold-Step-1-Version-2wise to dress in layers.  This way you can adjust your level of warmth as the night goes on. The only trouble with dressing in layers is that you need to get dressed indoors where it is warm and putting on multiple layers is a bit more complex than just tossing on a jacket. I have had sessions where I dressed for warmth and then had something delay my exiting the house, the result being me sweating up a storm before I got outside.

PREPPING THE AREA AROUND THE TELESCOPEfoldingtable

Even if you only have the eyepieces that came with your telescope and a star chart it might not be a bad idea to have somewhere to put these items down. A simply folding aluminum table can help a lot without being too much of a burden. You might also consider some kind of carrying case for the eyepieces. Keeping them in your pocket can be hard on the glass and coatings in the long run.

KNOW WHAT YOU WANT TO VIEW IN ADVANCE…OR DON’T

2241largeWell before you go out, you should decide what you would like to observe that night, or if you just want to aim the telescope around and see what you can find. The latter can be lots of fun, but it can also get old pretty fast if you don’t find anything of interest. The former does require some planning, so be sure to check your planisphere, planetarium program or other astronomical assistant before going out.

HAVE FUN!

Far too many folks turn hobbies into chores – Astronomy is by no means unique in this regard. Doing some work in any hobby to get the most out of it is to be expected, but turning it into a huge burden can make you burn out on astronomy.

www.spectrum-scientifics.com


Time for Saturn Viewing!

May is going to be an excellent month for viewing planets – Mars is still quite prominent, Jupiter will show up nicely in the Western sky as the sun sets, Mercury makes one of its rare viewable times on the 25th of this month, and Venus will continue to greet early risers. But the big star….err…planet of the month is Saturn.


saturn

(more…)

REPOST: So you got a new telescope for the holidays – A Quick Primer for new telescope users.

Be it X-mas, Hannukah, Kwanza, Solstice or Giftmas this is the season for getting telescopes as gifts. Sadly, many of these scopes might be rushed into usage and some critical steps might be 016skipped. This can result in a frustrating experience for a budding young astronomer who may give up their new hobby prematurely. This can be avoided if you only take the time and a few precautions to make certain you get the baby steps out of the way without too much tripping and falling.

1) Do as much as you can during daytime first!

I can’t stress this too much. Many folks assume they can assemble their telescope right out of the box at their chosen viewing spot – in the dark. Suffice it to say this is not a good idea. Assembling out of the box at the viewing site might be an extreme example but you should certainly try working your scope and getting the ‘feel’ for it during the daytime as much as possible. Take your telescope outside during the daytime and point it at a nearby tree or other object (the object should be at least 1/4 mile away). Use this object to align the finder scope (see below) as well as test how the eyepiece focuses. Try changing your eyepieces between the low and high powered ones to see how that works as well. Move the telescope in large movements as well as using the slow motion controls as well. When you do these things in the daylight you can get a much better feel for how they should work than if you try them at night. Also if you drop an eyepiece or loosen a screw you have a decent chance to find it. Get your mistakes out of the way when the sun is up.

2) Assemble your telescope properly

This should go without saying, but it is amazing how many folks skip a few steps or don’t attach parts, or don’t read the instructions properly. We’ve seen telescopes in for “repairs” just after the holidays that were just put together wrong, or some critical final steps were ignored (slow motion controls not attached, counterweights not placed). Most of the time, there are very few non-critical elements of a telescope’s construction. So be sure to follow the assembly procedure carefully. Allow yourself a couple of hours as well (maybe three hours for certain models of dobsonian telescopes) for the assembly. Don’t assume you can just put it together a 1/2 hour before you plan to head out and view.

3) Align your finder scope. Align your finder scope! ALIGN YOUR FINDER SCOPE!

Get the point? Many folks ignore this step until the last minute and we can tell you that trying to work a telescope without an aligned finger is very,very, very hard. Even the lower 084magnifications on a short focal length telescope only see a little under 1 arc degree of the sky. This is a tiny portion of the sky so hoping to find an object with just the eyepiece is really hard to do. There is a reason why almost all telescopes come with a finder scope. So make sure to align it (During the daytime per suggestion #1) . If your telescope comes with a red-dot finder instead of an optical finder scope, be certain to carefully align that as well during the daytime – and don’t forget to switch it off! A dead battery in a red dot finder is nobody’s friend.

4) Did you get an Equatorial mount? Figure out how it moves!

An equatorial mount has some great advantages over a regular altazimuth (altitude-azimuth) mount. It can track, be motorized, and the larger ones can even be used with setting circles to locate objects in the night sky. But these are only true if you take advantage of the equatorial mount’s features and set it up properly. During the daytime (suggestion #1 again!) try a rudimentary set-up of the equatorial mount. This does not have to be super accurate as some telescope’s instruction manuals may require, just enough to get mostly accurate tracking for a little while. Perhaps more importantly, get a feel for how the telescope moves – you are used to moving things in an up/down left/right fashion. Now you need to get used to moving the telescope in declination and right ascension. Try moving the telescope from one target to another using the mount properly during the daytime to get a better sense of it. One thing to keep in mind is that the counterweight is there for a reason – it shouldn’t be pointing down all the time.

5) Choose your first targets wisely!

Many folks go out with their telescope and just point it at the brightest thing in the sky. This is fine if the brightest object is a planet or the Moon, as there is lots to see. But very often at this time of year the planets might not be out until very late and the brightest thing in the sky is the star Sirius. Problem is, Sirius is just a star and stars appear as just a point of light even when magnified through your telescope. This can be a very boring target and can be disappointing if it is the only bright object. So make certain before you go out for your first night’s viewing that you know what will be up! Most telescopes these days come with some rudimentary planetarium software that can show you what the sky will be like on any night. Failing that there are online websites that do the same thing (sometimes better). Planispheres can also be used, and if you have a Smartphone or pad you should download a planetarium app like Google Sky (its free). Depending on what time of the month it is, the Moon may not be up during evening hours. Since we suggest the Moon as a great first target for your telescope you might want to wait for it. Failing that, try to look for the brighter planets.

6) Got a computerized telescope? You might want to ignore it -at first.

And by that we mean the computer, not the telescope. Some models of computerized telescope don’t allow you to operate the telescope without the computer, but if you can try to figure out as much as you can without computer aid before you even start using it. Computers often make many things in our lives easier, but they can also frustrate you -a lot. Most computerized telescopes may require you to have at least some knowledge of the night sky to set up the alignment system (the telescope usually needs to be aimed at a couple of stars to align). This can mean that if you don’t know what stars to point at or if the system is a bit off because a tripod leg is set short than another you can spend a lot of time trying to get the computer to act properly and get frustrated. So rather than doing that spend some time getting familiar with the night sky first by using your scope on bright, easy-to-find objects.

7) Learn, learn learn!

There’s a host of information for astronomy newbies on the internet and in books. Amateur astronomers are very keen on sharing their knowledge and experience with you. Check out the major magazines online websites such as Sky & Telescope or Astronomy. There are a zillion astronomy websites with forums as well you might wish to peruse. Even on this blog we have a collection of Telescope Tips you should check out for helpful advice. Also consider joining or at least contacting your local astronomy club – you can find all kinds of help from them, as well as many other benefits from membership (such as loaner equipment).

If your first night with your telescope is a good one, then you’ll have a much better time with the hobby. But always remember a little planning goes a long way!

Happy New Year!

Interested in buying telescopes?

www.spectrum-scientifics.com

Starring in March only: COMET PanSTARRS

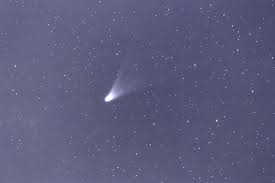
You may have already heard some buzz about Comet ISON, which has a very good chance of being a very bright and visible comet later this year (2013). But there is a decent chance that we have a preview naked-eye comet this month by the name of Comet PanSTARRS

PanSTARRS

PanSTARRS will make its closest approach to Earth (about 93 million miles) tomorrow – but it really will not be visible despite being at its closest state. Only a couple days later will it creep up over the Western horizon after sunset. On or about March 10th will it start to develop its ‘tail’. In the middle of the Month, the Comet should truly be visible. At time the Moon might interfere. PanSTARRS should be visible in the Western skyline for much of the rest of March.

PanSTpositionNASA

The brightness of PanSTARR is estimated to be about as bright as a star in the Big Dipper. So if you can see the Big Dipper in your night sky, PanSTARR should be visible – albeit more streaky as a comet is want to be.

All of this comet discussion comes with a caveat – COMETS ARE VERY HARD TO PREDICT. A wise astronomer once said ” Comets are like cats – they have tails and do exactly as they please”. Many a comet has done something unexpected resulting in disspointing viewing: breaking up, not have the right tail orientation, etc. On the other hand, it could be even brighter than expected (-1 magnitude, not quite as bright as Sirius).

But hey, if you are out on a clear March night, it won’t hurt to glance Westward.

These links might have more information for your viewing enjoyment:

NASA

EarthSky

Universe Today

www.spectrum-scientifics.com

Astronomy Hints #15: Filter! Filter!

One of the more wide-range things to use in astronomy are filters. There are a large number of them and their purpose varies greatly. They can reduce light, help with light pollution, bing out details, or help with astrophotography. Most filters thread on easily to telescope’s eyepieces and can change your viewing experience.

But when choosing filters one must remember this: They are filters, they are designed to remove something, even if it is unwanted. Some folks get the idea, especially with light-pollution filters, that filters make objects being viewed much brighter. But that is not the case. Think of it this way: if you have a kitchen odds are ou might have a water filter in your faucet or some kind of pitcher. When you use this filter you do not make more water by using it, you are merely removing the stuff in the water you do not want.  Water filters are actually pretty good because if you put 1 liter of water over a water filter odds are you will end up with very close to 1 liter of clean water. But you won’t end up with 1.1 liters. Sounds obvious, but some folks get the idea that that is what astronomy filters can do. But it is not so. In fact using an astronomy filter on the light from the stars means you are going to lose some of the good light along with the stuff you do not want. If we go back to out water filter you can think of our 1 liter of unfiltered water becoming .9 or even .8 of a liter.

But let us discuss the various types of filters:

Moon Filters

Moon filters are simple neutral density filters (which means they evenly cut down on light across the visible spectrum) that thread onto your eyepiece. They are used because the Moon is actually very, very bright and viewing it in even small telescopes at it can hurt your eyes after a short time (not permanently, mind you). A Moon Filter can make viewing more comfortable. Typically filters allow in 25% of the light, or 12% (for larger telescopes)  or in a variable model you adjust yourself .

Solar Filters

Solar filters are the only filters that do not thread onto the eyepiece. The go over front of the telescope. If you find a ‘solar filter’ that is meant to thread onto an eyepiece, destroy it immediately. Those are very dangerous as they can crack letting through sunlight that can damage your eyes. Don’t use them, Don’t keep them – someone else might be tempted. Destroy them.

Most solar filters are simple screens of Mylar that cuts down on 99.999% of the light so that you can safely view the sun. Mostly what you will see is a white disc with some sunspots.  It makes for some nice viewing during the high points of the sunspot cycles, during the lows the sun can seem a bit featureless, however.

Another type of Solar Filter is the Hydrogen-Alpha Filter. These allow you to view reddish colored prominences and solar flares. They are very expensive, however (in the thousands of dollars) and they need a certain amount of ‘tweaking’. But they can give very impressive views of solar activity.

Color Filters

Color Filters are used on the planets or the Moon – they cut off too much light to use on deep sky objects. Color filters are used to try and bring out more details on the planets that might get washed out in regular filtering. Details brought out might include the bands on Jupiter, polar caps on Mars, more lunar crater detail, and so on. Color filters can be hit-or-miss among astronomers. Some think they are great, others find them less useful. The field seems rather subjective but if you plan on viewing the Moon & Planets more than anything else you might wish to invest in a set.

Light Pollution Filters

Light Pollution Filters are designed to help astronomers who live in light-polluted suburbs or cities. They are not a substitute for dark skies, but they can certainly help out when options are limited. Light pollution filters help by cutting down on frequencies of light that streetlights, parking lot lights, and other human-made light sources produce, while letting through most of the light that stars, nebulea, and other deep sky objects emit.

This set of quickie photos can give you and idea of the effect of the filters. Here is a shot of a city streetlamp that is on during the daytime:

Street Lamp, through a phone camera, daytime, unfiltered.

And then with an Orion Ultrablock Filer held over the lens:

Same streetlight, with light pollution filter held over the camera lens. Note the difference.

You will notice that the filter helps, but does not completely eliminate the streetlight light, and it does have some effect on the natural background light as well. This is why they are helpful but not a complete solution to dark skies.

Light Pollution filters also are of little use on the Moon (which is bright enough to not be bothered by light pollution) or the major planets (which are similarly unaffected by light pollution). They are of limited effect on the outer planets as those planets emit light over much of the spectrum and get filtered as much as the background light.Some light pollution filters may be referred to as Nebula filters, which are very focused and are even designed to cut down on some of the light from nearby stars.

Astrophotography Filters

There are a huge number of these and their uses could fill a book – a book about astrophotography that is. These filters do things like cut off the IR portion of the spectrum (which messes up CCD chips in digital cameras) or filters out only the all but the Red or Green or Blue part of the spectrum for monochromatic cameras. The number of these filters has expanded vastly in the past few years. Covering these would take a very large entry so we will leave them for now as it is beyond the scope of Astronomy Hints.

Refractor Violet Filters

These filters are for one type of telescope – refractors. The large lenses in these telescope sometimes act as prisms and break up the light into component colors. This is especially noticeable on bright objects like Jupiter or the star Sirius. The effect is that the object being viewed will have a violet colored halo that is affectionately known as ‘purple haze’. Violet-Minus filters cut out this portion of the spectrum without affecting overall viewing much.  If you have a larger refractor that sometimes shows the ourple haze you might consider getting one of these filters.

www.spectrum-scientifics.com

Venus & Jupiter – Teaming Up!

The March month of excellent planetary astronomy viewing continues tonight with a treat! Jupiter & Venus, which have been close in the early evening sky this month, are going to be almost paired up right together just after sunset this evening (3/13/2012). This is a fairly rare phenomenon and we will not see it happen again until 2015. This event can be seen with the naked eye even in light polluted regions – at least as long as the skies are clear. Be sure to take advantage of this event even if you don’t have a telescope.

http://www.spectrum-scientifics.com

5 Planets Visible

This isn’t rare, but it isn’t really common either. This month (or at least this week) astronomical viewers can have a chance to see 5 planets in a single evening.

After sunset, Mercury will be visible just above the horizon in the West sky – and we do mean just. Trees and houses may block your view of Mercury. However Venus and Jupiter will be more visible right above them also right after sunset, nice and bright, along with Mars, which while still not in occultation is pretty bright, rising in the East  just after sunset.

Later in the evening, Saturn will rise in the Eastern sky – this is the only planet you will need to wait for  as it is not immediately visible after sundown.

Although Mercury may be blocked by buildings, all of these planets can be seen with the naked eye, even in light-polluted areas.

For your best viewing be sure to get an area with a clear horizon so that all the planets can be seen.

Happy viewing!

www.spectrum-scientifics.com